顯示具有 Linux 標籤的文章。 顯示所有文章

2024年7月10日 星期三

portainer 新增 LLM container

Reference:
 
用portainer安裝Ollama, Open-WebUi
 
登入 http://your-server-ip:9000 後,選擇 Live Connect

2024年7月8日 星期一

Rocky Linux 9 + docker + portainer

Reference:
 
install docker
dnf config-manager --add-repo https://download.docker.com/linux/centos/docker-ce.repo
dnf -y install docker-ce docker-ce-cli containerd.io docker-compose-plugin
systemctl --now enable docker

install portainer
docker volume create portainer_data
docker run -d -p 9000:9000 --name=portainer --restart=always -v /var/run/docker.sock:/var/run/docker.sock -v portainer_data:/data portainer/portainer-ce

login portainer and create account
http://your-server-ip:9000

restart docker
systemctl restart docker

Rocky Linux 9 update kernel

Reference:
 
更新步驟:
rpm --import https://www.elrepo.org/RPM-GPG-KEY-elrepo.org
dnf install https://www.elrepo.org/elrepo-release-9.el9.elrepo.noarch.rpm
dnf --disablerepo="*" --enablerepo="elrepo-kernel" list available
dnf --enablerepo=elrepo-kernel install kernel-ml
grubby --default-kernel
sync;reboot  #重開機後生效
 

2024年5月10日 星期五

Rocky Linux 9 安裝 WordPress

Reference:
 
#安裝 apache httpd
dnf install httpd -y
systemctl enable httpd
systemctl start httpd
 
#設定防火牆
firewall-cmd --permanent --zone=public --add-service=http
firewall-cmd --permanent --zone=public --add-service=https
firewall-cmd --reload

2024年4月12日 星期五

FreeIPA + FreeRadius

Reference:
https://www.howtoforge.com/how-to-install-freeipa-on-rocky-linux/
https://blog.csdn.net/cjenjingwen/article/details/121969001

RockyLinux 9.2 minimal
hostnamectl set-hostname freeipa.anasys.local
vi /etc/hosts
    add 192.168.2.197    freeipa.anasys.local    freeipa
hostname -f

#### 安裝 FreeIPA
#RockyLinux 已經有 IDM packages
#https://forums.rockylinux.org/t/missing-groups-or-modules-idm-dl1/9279/5
#dnf module enable idm:DL1 (Rocky Linux 8才需要裝)

dnf install ipa-server ipa-server-dns -y
ipa-server-install --setup-dns --allow-zone-overlap

2024年3月25日 星期一

Xwindow remote display on RockyLinux / CentOS 8 & 9

用 ssh -X user@host 可以做remote display,搭配ssh-keygen可以做到不用密碼切換成user環境

RockyLinux要改的部分:
https://www.answertopia.com/rocky-linux/displaying-rocky-linux-applications-remotely-x11-forwarding/

ssh key的部分:
https://hackmd.io/@MagicJackTing/BywNwqdTD?utm_source=preview-mode&utm_medium=rec

2023年11月15日 星期三

Linux ACL 目錄/檔案權限繼承

Reference:
Linux ACL 檔案權限設定 setfacl、getfacl 指令使用教學與範例
 
有一台 NAS 的 NFS share 預設值會啟用 ACL,但預設權限是 770 (rwxrwx---)。
通常預設權限是 755,這個預設權限造成同 group 的帳號可以修改!
 
把 NAS ACL 設定關閉後,新建的目錄/檔案會按照帳號的 umask 權限,但之前已經產生的檔案必須自己修改。
 
查詢 ACL 指令:
getfacl <filename> 

移除 ACL 指令(含子目錄):
setfacl -bR <filename>

移除 group 寫入檔案權限指令(含子目錄):
chmod -R g-w .

找出目錄下有 group 寫入權限的檔案指令(排除symbolic links):
find . -perm -g+w ! -type l

2023年2月9日 星期四

CentOS 7 NFS exports

Reference:
 
NFS server:
yum install nfs-utils
vi /etc/exports
/data/     192.168.0.0/24(rw,sync,no_root_squash,no_all_squash)

/data: 共享目录位置。
192.168.0.0/24: 客户端 IP 范围,* 代表所有,即没有限制。
rw: 权限设置,可读可写。
sync: 同步共享目录。
no_root_squash: 可以使用 root 授权。
no_all_squash: 可以使用普通用户授权。

 
systemctl enable rpcbind; systemctl start rpcbind
systemctl enable nfs; systemctl start nfs

NFS client:
showmount -e <nfs_server>
mount -t nfs <nfs_server>:/data /data

CentOS 6 update glibc version

Reference:

mkdir glibc_2.17
cd glibc_2.17
wget http://copr-be.cloud.fedoraproject.org/results/mosquito/myrepo-el6/epel-6-x86_64/glibc-2.17-55.fc20/glibc-2.17-55.el6.x86_64.rpm
wget http://copr-be.cloud.fedoraproject.org/results/mosquito/myrepo-el6/epel-6-x86_64/glibc-2.17-55.fc20/glibc-common-2.17-55.el6.x86_64.rpm
wget http://copr-be.cloud.fedoraproject.org/results/mosquito/myrepo-el6/epel-6-x86_64/glibc-2.17-55.fc20/glibc-devel-2.17-55.el6.x86_64.rpm
wget http://copr-be.cloud.fedoraproject.org/results/mosquito/myrepo-el6/epel-6-x86_64/glibc-2.17-55.fc20/glibc-headers-2.17-55.el6.x86_64.rpm
rpm -Uvh *.rpm

完成後檢查
strings /lib64/libc.so.6 | grep GLIBC

2025/5/6 update:
如果有裝glibc i686,需要抓 glibc-2.17-55.el6.i686.rpm,  glibc-devel-2.17-55.el6.i686.rpm 一起更新。

2022年12月2日 星期五

CentOS Gnome xwindow 縮小後消失的處理方法

Reference:

狀況:
xwindow 縮小後消失

解法:
Right-click on the "task bar", click "Add to Panel", select "Window List" and "Add". 


2022年10月3日 星期一

LInux samba service on CentOS 7

Reference:
 
安裝:
yum install -y samba

設定:
cp /etc/samba/smb.conf /etc/samba/smb.conf.ori
vi /etc/samba/smb.conf
 
[global]
        workgroup = SAMBA
        security = user
        #passdb backend = tdbsam

        map to guest = bad user
        #printing = cups
        #printcap name = cups
        #load printers = yes
        #cups options = raw

[images]
        comment = public images
        path = /path/to/images
        browseable = Yes
        read only = Yes
        writable = Yes
        guest ok = Yes
        force user = smbuser
 
啟動:
systemctl enable smb.service ; systemctl enable nmb.service
systemctl restart smb.service ; systemctl restart nmb.service
 
設定使用者帳號:
user add smbuser
smbpasswd smbuser
chown -R smbuser /path/to/images

2022年7月13日 星期三

Cadence Virtuoso IC0616 on CentOS 6

狀況:Virtuoso IC0616在CentOS 5可執行,但在CentOS 6出現錯誤訊息command not found。

原因:IC0616 需要 ksh, 32bit Xwindow lib

解法:
1. upload CentOS 6 i686 ISO to host
2. mkdir /media/CentOS/
3. mount -t iso9660 -o loop /root/CentOS-6.10-i386-bin-DVD1.iso /media/CentOS/

yum --disablerepo=\* --enablerepo=c6-media install ksh
yum --disablerepo=\* --enablerepo=c6-media install libXext
yum --disablerepo=\* --enablerepo=c6-media install libXt
yum --disablerepo=\* --enablerepo=c6-media install libGL
yum --disablerepo=\* --enablerepo=c6-media install libGLU
yum --disablerepo=\* --enablerepo=c6-media install freetype
yum --disablerepo=\* --enablerepo=c6-media install libXrender
yum --disablerepo=\* --enablerepo=c6-media install libXp
yum --disablerepo=\* --enablerepo=c6-media install glibc-devel

2022年7月2日 星期六

Run sublime on CentOS 6

CentOS 6 執行 sublime text 3, 4 會顯示需要 gtk 3
嘗試在 CentOS 6 安裝 gtk 3,但是還有很多相關套件要裝,最後放棄。

測試 sublime test 2 可以在 CentOS 6 執行,最後採用這版本。

2. tar jxvf Sublime\ Text\ 2.0.2\ x64.tar.bz2
3. mv Sublime\ Text\ 2 /opt/sublime2
4. ln -s  /opt/sublime2/sublime_text /usr/bin/sublime_text

2022年6月23日 星期四

CentOS install package by ISO

Reference:
 
Upload CentOS ISO file. Ex: /root/CentOS-6.10-i386-bin-DVD1.iso
 
mkdir /media/CentOS/
 
mount -t iso9660 -o loop /root/CentOS-6.10-i386-bin-DVD1.iso /media/CentOS/
 
yum --disablerepo=\* --enablerepo=c6-media install libX11.i686

CentOS install TclPro


CentOS 只能安裝到 1.4 版,因為 1.5 版只有 FreeBSD 的安裝檔。
測試 CentOS 5, 6都可以安裝。

2022年5月21日 星期六

Linux 密碼原則 複雜度設定

Reference:
 
設定密碼有效期限
vi /etc/login.defs
PASS_MAX_DAYS   90  # 密碼有效天數,多久要變更密碼
PASS_MIN_DAYS   1     # 變更密碼後要多久才能再修改密碼
PASS_MIN_LEN    12    # 密碼的最小長度
PASS_WARN_AGE   7  # 密碼失效之前幾天發出警告訊息

設定密碼複雜度
vi /etc/pam.d/system-auth
password    requisite     pam_pwquality.so try_first_pass local_users_only retry=3 authtok_type= minlen=12 minclass=4 lcredit=-1 ucredit=-1 dcredit=-1 ocredit=-1

#minlen=12    密碼長度12以上
#minclass=4   包含4種類型(大寫、小寫、數字、符號)
#lcredit=-1      小寫1個以上
#ucredit=-1     大寫1個以上
#dcredit=-1     數字1個以上
#ocredit=-1     符號1個以上
 
Linux check user password expiration
chage -l userName 
 
List User Last Login on Linux
lastlog -u <user>

2022年3月6日 星期日

CentOS 7 更新 sshd 版本

Reference:
 
安裝需要的工具
yum -y install wget tar gcc make perl
 
download zlib last version
到 https://zlib.net/ 確認最新版本
wget https://zlib.net/zlib-1.2.11.tar.gz

download openssl last version
到 https://www.openssl.org/source/ 確認最新版本
wget https://www.openssl.org/source/openssl-1.1.1m.tar.gz

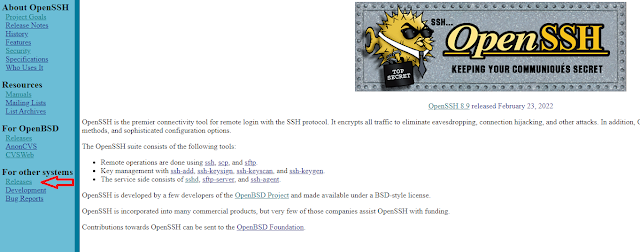
download openssh last version
到 https://www.openssh.com/ 確認最新版本
https://www.openssh.com/portable.html
wget https://cdn.openbsd.org/pub/OpenBSD/OpenSSH/portable/openssh-8.9p1.tar.gz
 

2021年9月10日 星期五